11C: Brochure Activity – Paragraph Styles
Overview
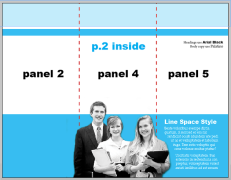
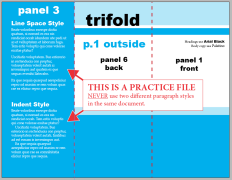
This activity will demonstrate your ability to setup paragraph styles in InDesign, prepare an image to text-wrap using Photoshop, and actually wrap text around an image in InDesign.
ACTIVITY EXAMPLE:
Preparation
READING: Review the brochure project page to ensure you’re on track for this week.
Instructions
1. DOWNLOAD THE ACTIVITY
Click here to download the files you’ll need for this activity. This package has all the fonts, images, and other files for this activity.
2. INSTALL THE FONTS
Install the fonts in the “Document Fonts” folder if computer doesn’t have them: “Arial Black”, “Palatino”, or “MinionPro” (bold and regular).
3. OPEN INDESIGN FILE
Open the InDesign file named “11CYourName.indd”. Open the .idml file if you don’t have CS6.
4. PARAGRAPH STYLES TUTORIAL
Follow the paragraph styling tutorials (below). Use the activity examples (above) to check your work.
Paragraph Styling Tutorial (click to open)

5. TEXT WRAPPING TUTORIAL
Follow the text wrapping tutorial (below). Use the activity examples (above) to check your work. NOTE: Use the same .indd file that you opened in step 3 for both step 4 and step 5.
6. SAVE
Save the .indd file with your name: Example: “11CJake Spencer”. Save it in the same folder that you downloaded in Step 1, and rename the folder with your name: Example: “11CJake Spencer.”
7. PACKAGE FILE
Go to “File – Package.” Click “Package.” A “printing instructions” dialog box will appear. This is only necessary for future design work that will be printed a professional copy shops. You can click “continue.” Select a location and click “package.” InDesign will create a folder which includes the InDesign file, document fonts, and document links.
8. CHECK FOLDER
Double-check that the packaged folder has the following:
• .indd file named with your name: Example: “11CJake Spencer”
• “Document fonts” folder with font files inside- (“Arial Black”, “Palatino”, or “MinionPro” (bold and regular)
• “Links” folder with images inside- textwrap.psd
9. ZIP PROJECT FOLDER
Right-click the folder and choose “compress” on Mac and “zip” on PC.
10. SUBMISSION
Go to 11C Submission and upload your .zip file. Once you have attached the file, click on it to make sure the file opens correctly before you submit it. Hit “Submit to Dropbox”.


