5C: Masking Activity
Overview
This week, you’ll deepen your understanding of Photoshop by using layers and masks to blend images. When two images are stacked as two separate layers in Photoshop, only the image on the top layer can be seen. Add a layer mask to the top layer and paint with the brush tool and black foreground color to hide parts of the top layer (and any effects that are on that layer) and reveal the layer underneath. Then if you want to hide the second layer again and reveal the top layer, just bring white to the foreground and paint on the layer mask to restore the image on the top layer.
This is called “nondestructive editing” and it’s one of the powerful editing tools in Photoshop. A montage is when the pixels of two or more images are gradually blended together to become one. Montages do not have hard edges, but instead have intermingled pixels from multiple images. This gradual blending effect is achieved by reducing the opacity of the brush you are using to “paint” on the layer mask.
ACTIVITY EXAMPLE:
Preparation
READING: Read the montage project guide in Week 6 > 6A Montage Project so you will understand the project.
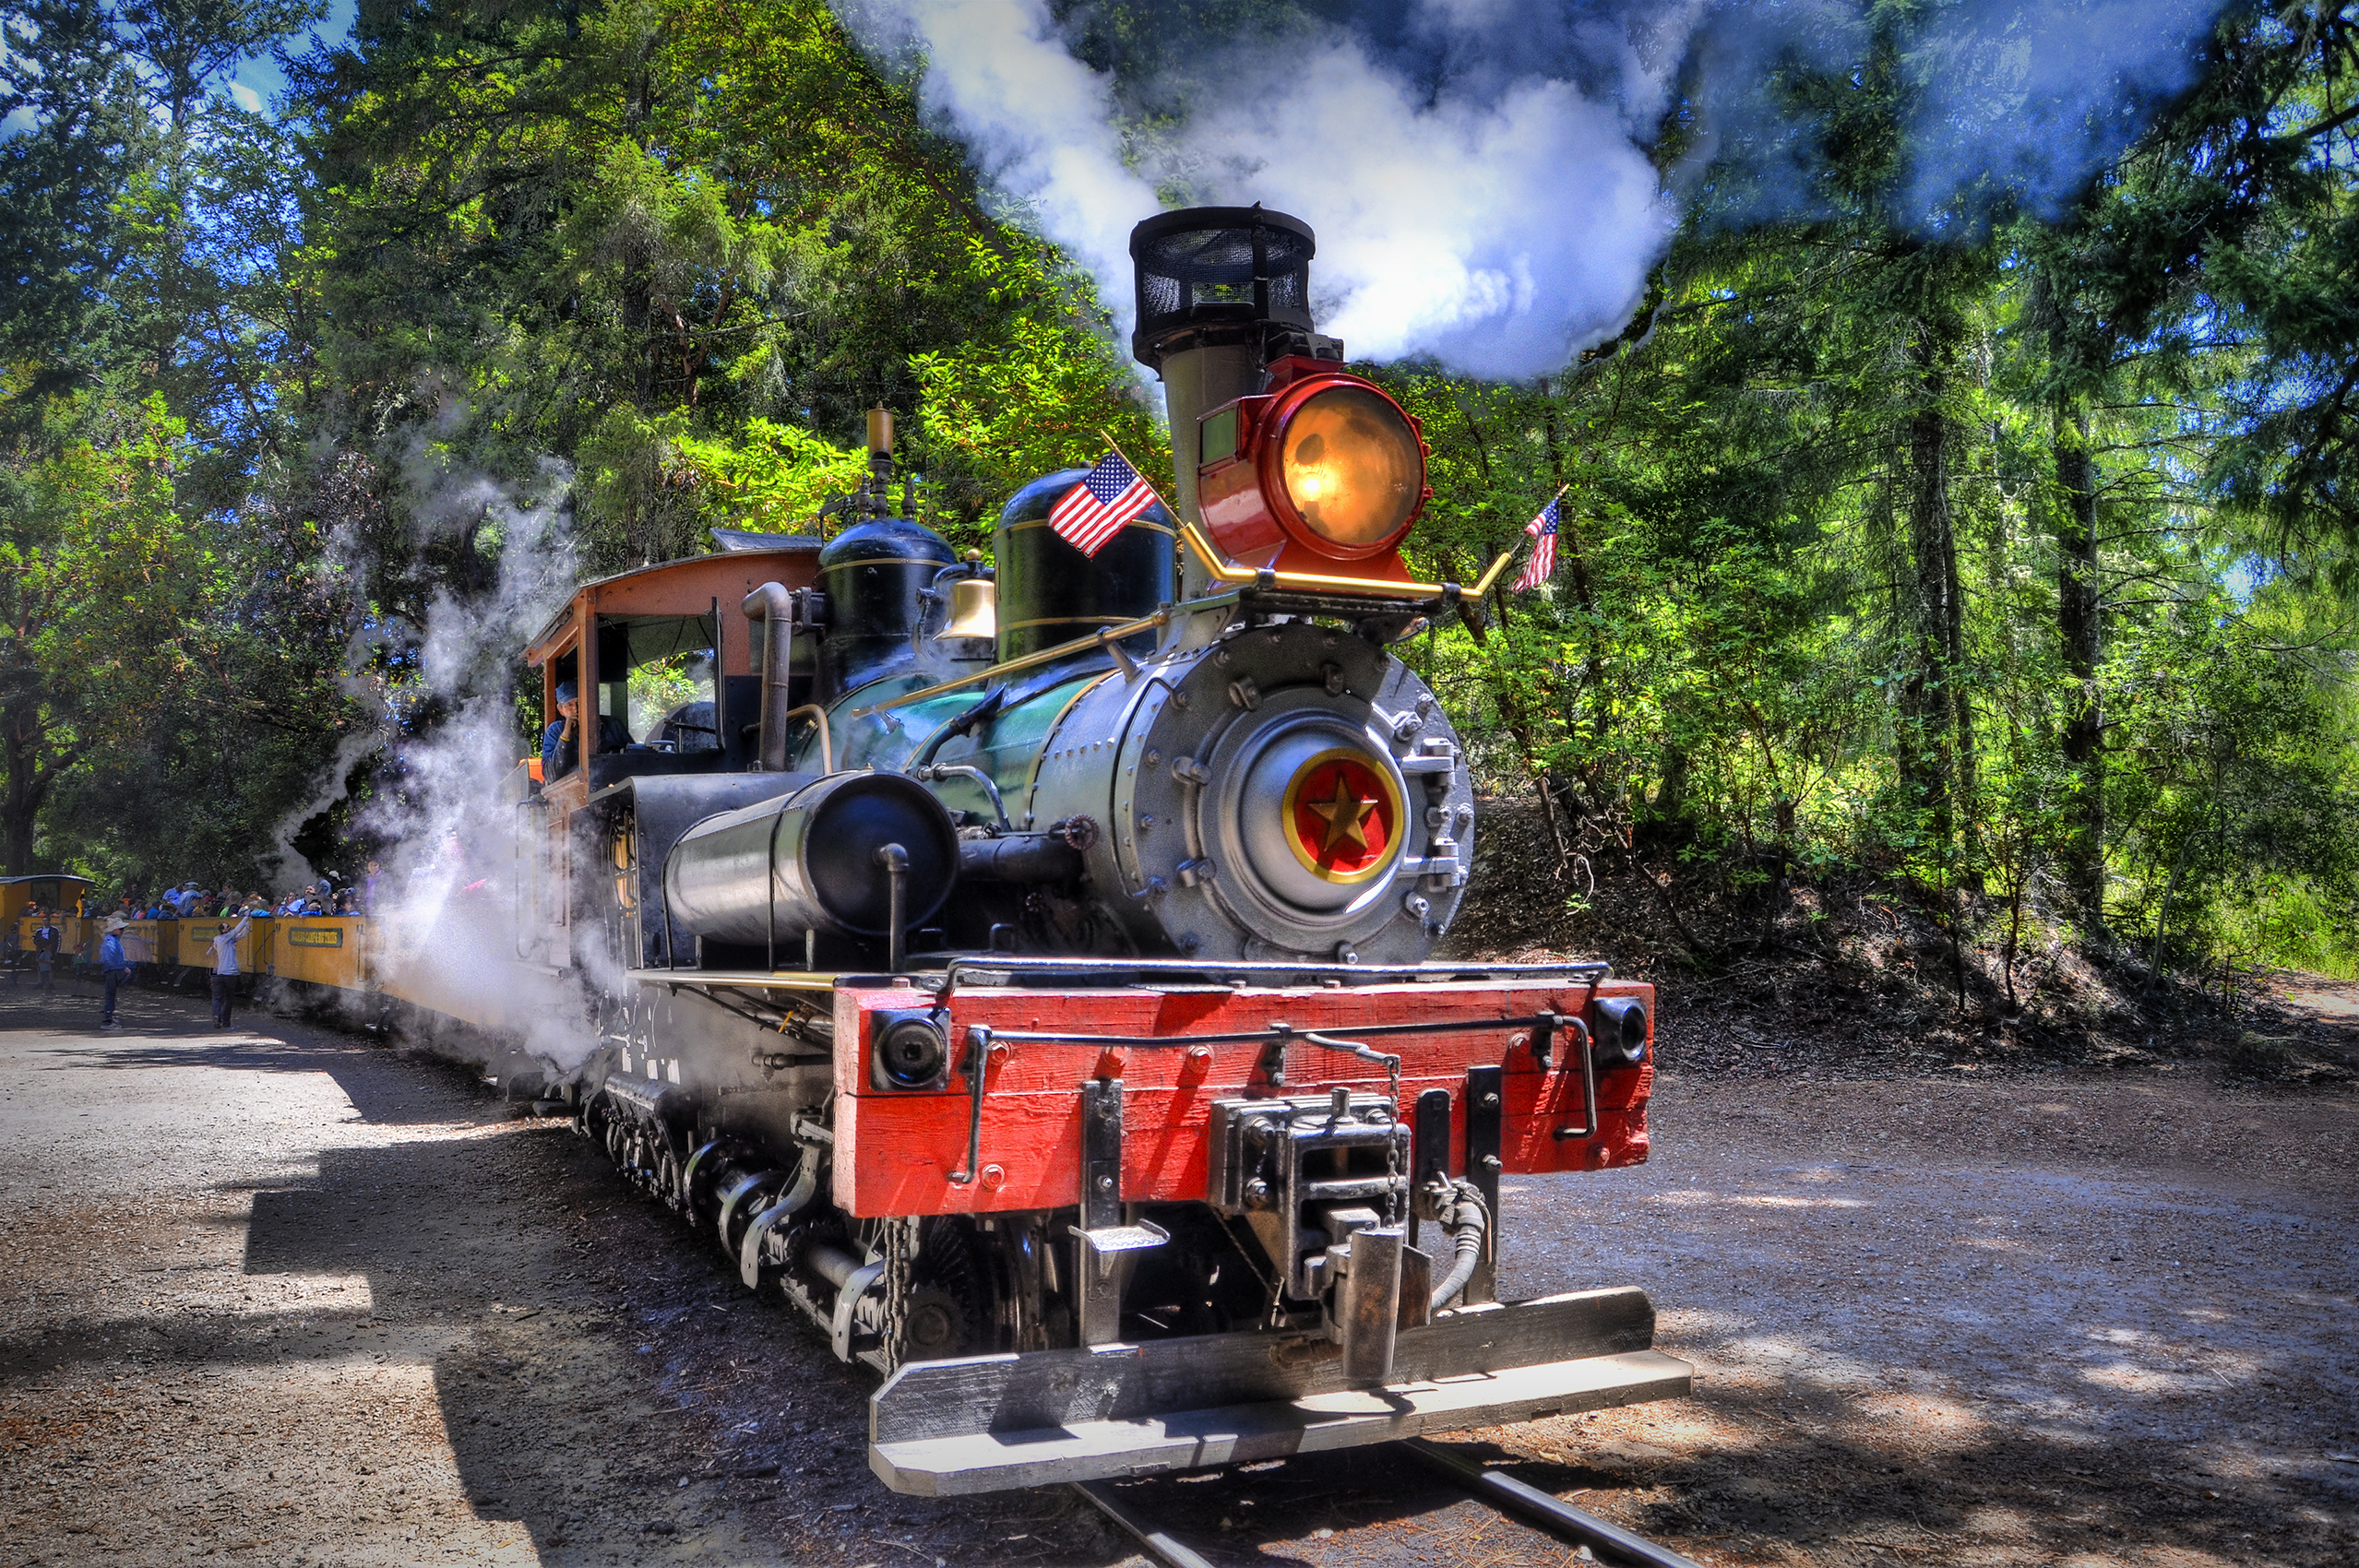
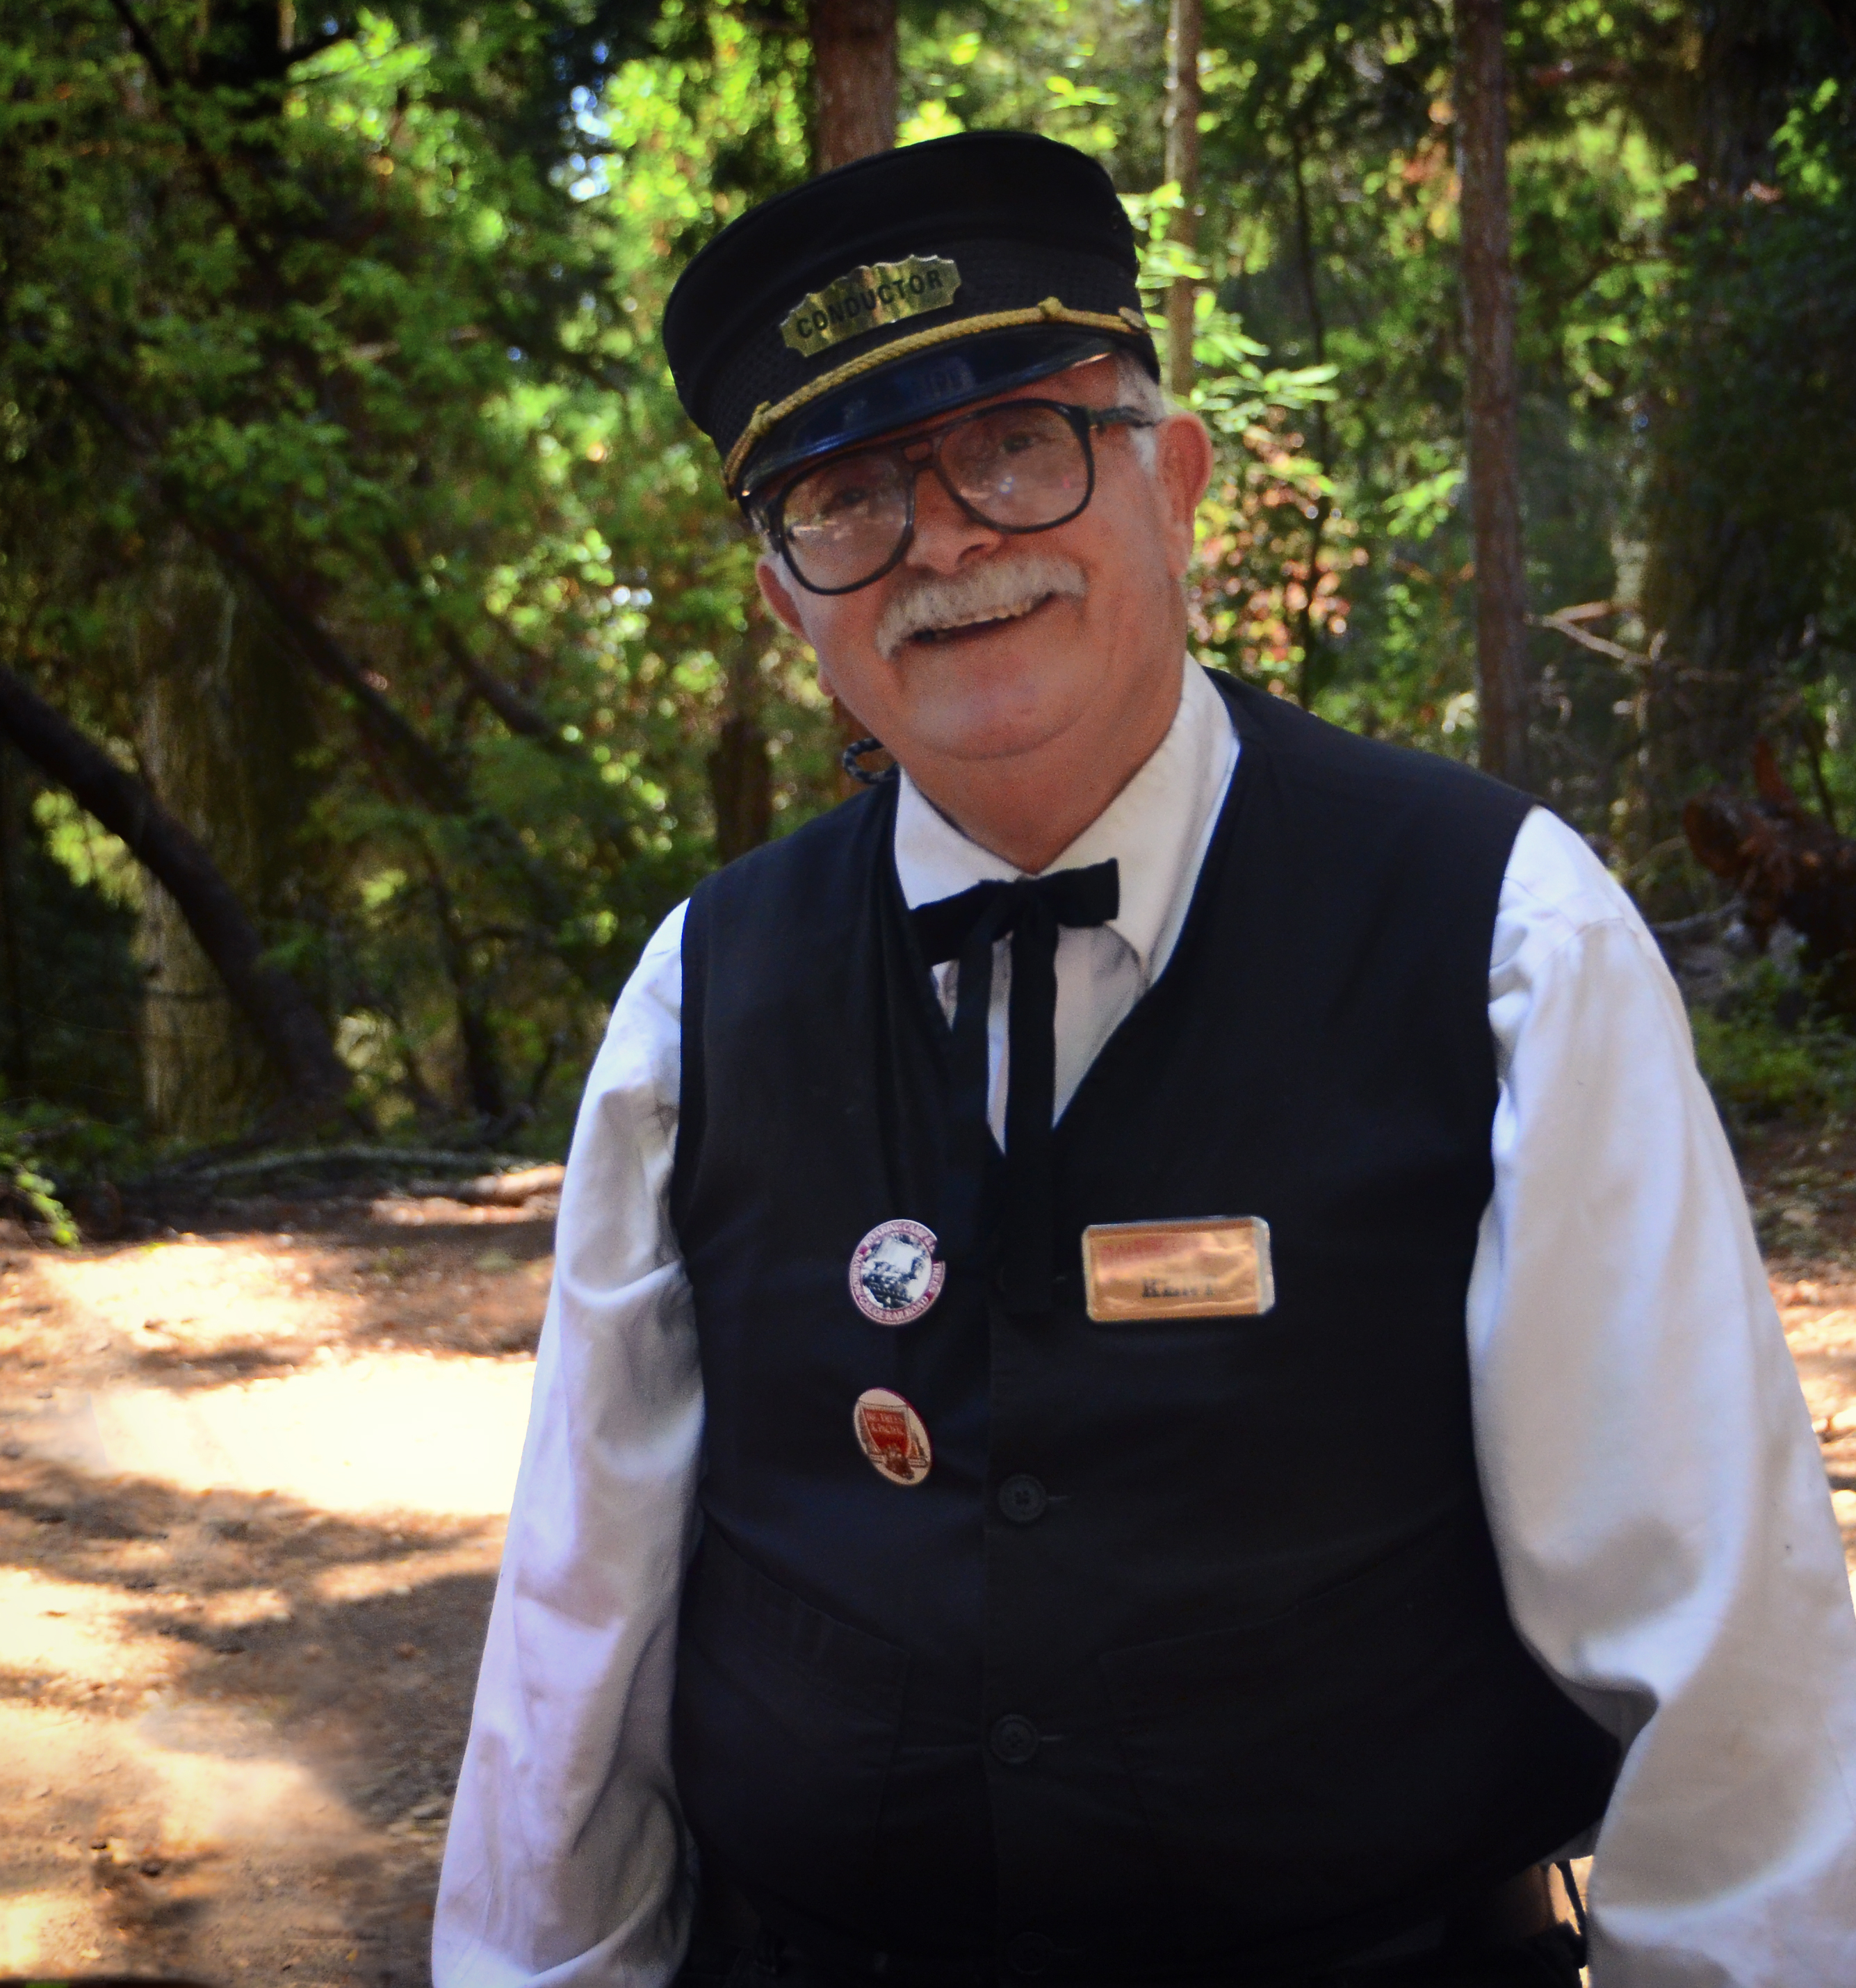
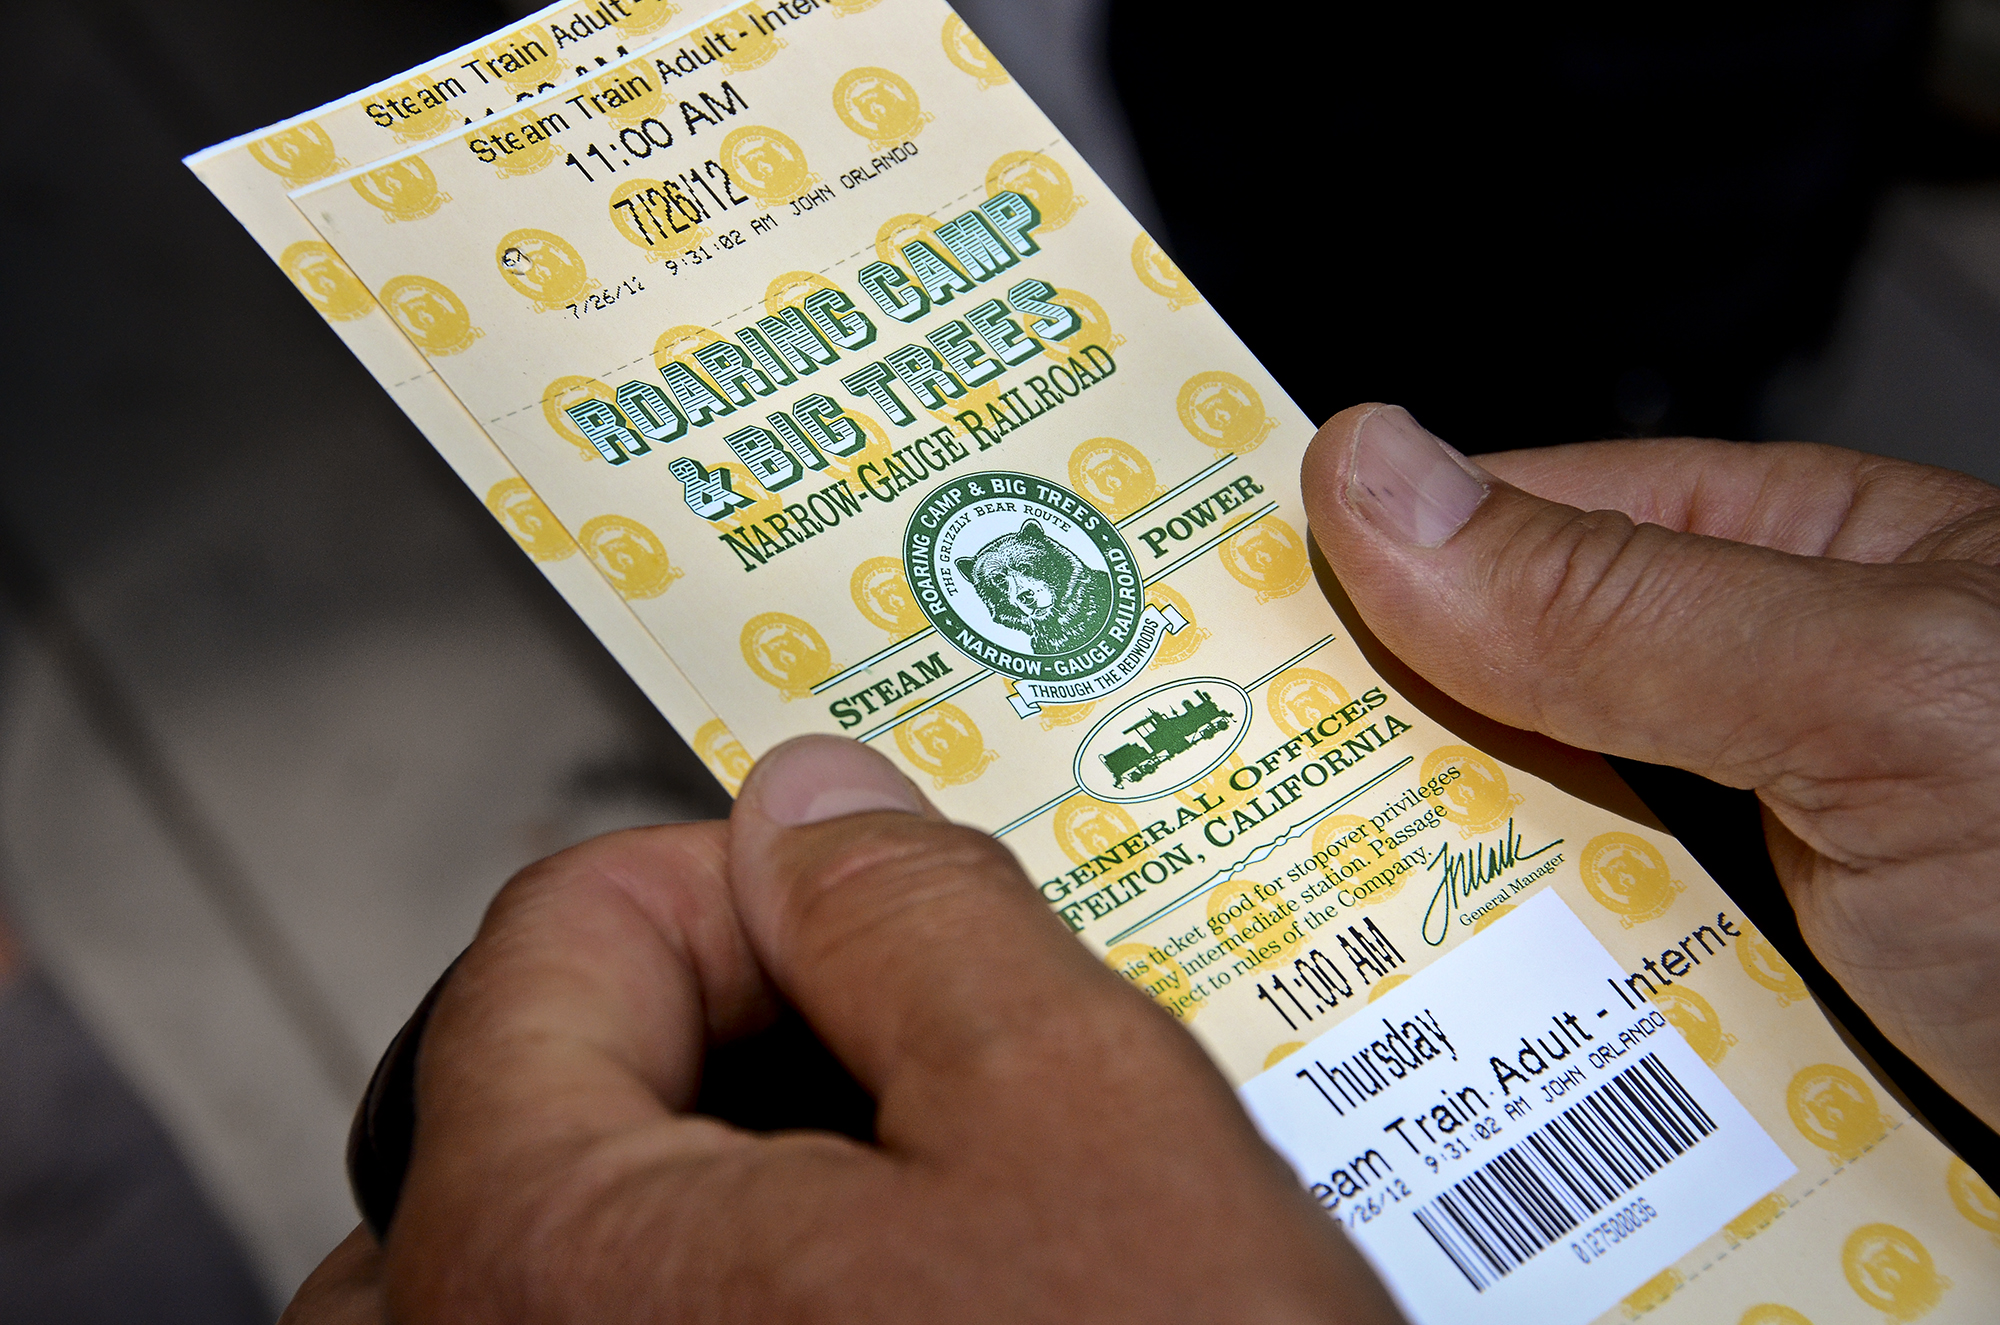
Click on these thumbnails and right-click to download the full-sized version of these images:
Instructions
1. DESIGN
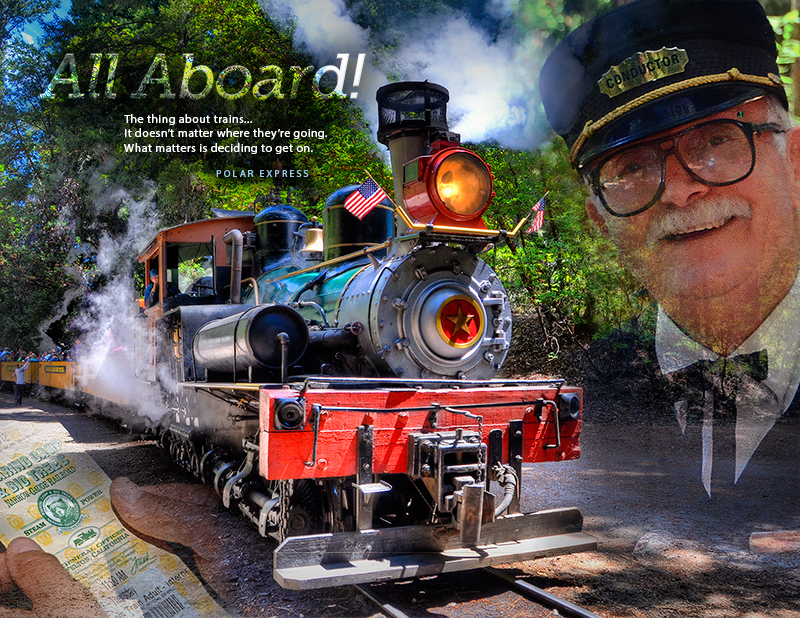
- Click the Activity Example above to view it larger. This example is what your final design should look like.
- Click the three thumbnails under Preparation to make them larger, then right-click to download each image.
- Open the images in Photoshop. They will open as three separate tabs.
- Use the train image as the background. Click the crop tool and open the dropdown on the top left, then choose “Size and Resolution.” Enter “11 inches” under “width” and “8.5 inches” under height. Leave “Resolution” blank. Reposition the crop tool as desired and double click to crop exactly as the Activity Example is cropped.
- Next, go to the image of the conductor. Select the lasso tool and type “100px” into the “feather” box at the top. Make a selection with plenty of space around the conductor to allow room for a gradual blend.
- Click the top tab of the conductor image and drag down. This will pull the image out of the tab at the top.
- Click the Move Tool (black arrow) and click and drag the selection you made of the conductor into the train background image. Use the move tool to reposition the conductor as shown in the Activity Example and hold down the shift key to resize.
- Add a layer mask to this top “conductor” layer (icon at bottom of layers palette that looks like a camera)
- Hit the “B” key to load the brush tool and make sure the hardness is turned down in the top menu bar. Be sure that black is your foreground color at the bottom left.
- Use a smaller soft-edged brush at 100% opacity to hide the hard outside edges. Use a larger soft-edged brush at 30% opacity to gradually blend the top image into the bottom image. The left and right bracket keys on your keyboard will allow you to quickly make the brush size bigger or smaller.
- Repeat steps f through j with the train ticket image.
- Hit “T” on your keyboard, or use the type tool, to add text to the image as seen in the activity example (left). Select typefaces that closely match the example. Use a blending mode at the top of the layers palette to mimic the transparent look of the words “All Aboard.” (Do your best to mimic the text. Try added shading to the image behind the text with a soft brush with the transparency turned down. You can also try duplicating the layer to make it easier to see.)
- Save the project as a .psd to keep the layers intact for future editing.
2. SET RULERS and SET VIEW
Set Photoshop rulers to inches. Go to “View>Rulers” the double-click inside the rulers that appear at the top and left of your document. In the window that opens, chose “Inches” under “Rulers.” Go to “View” choose “Fit to Screen.”
3. SCREENSHOT
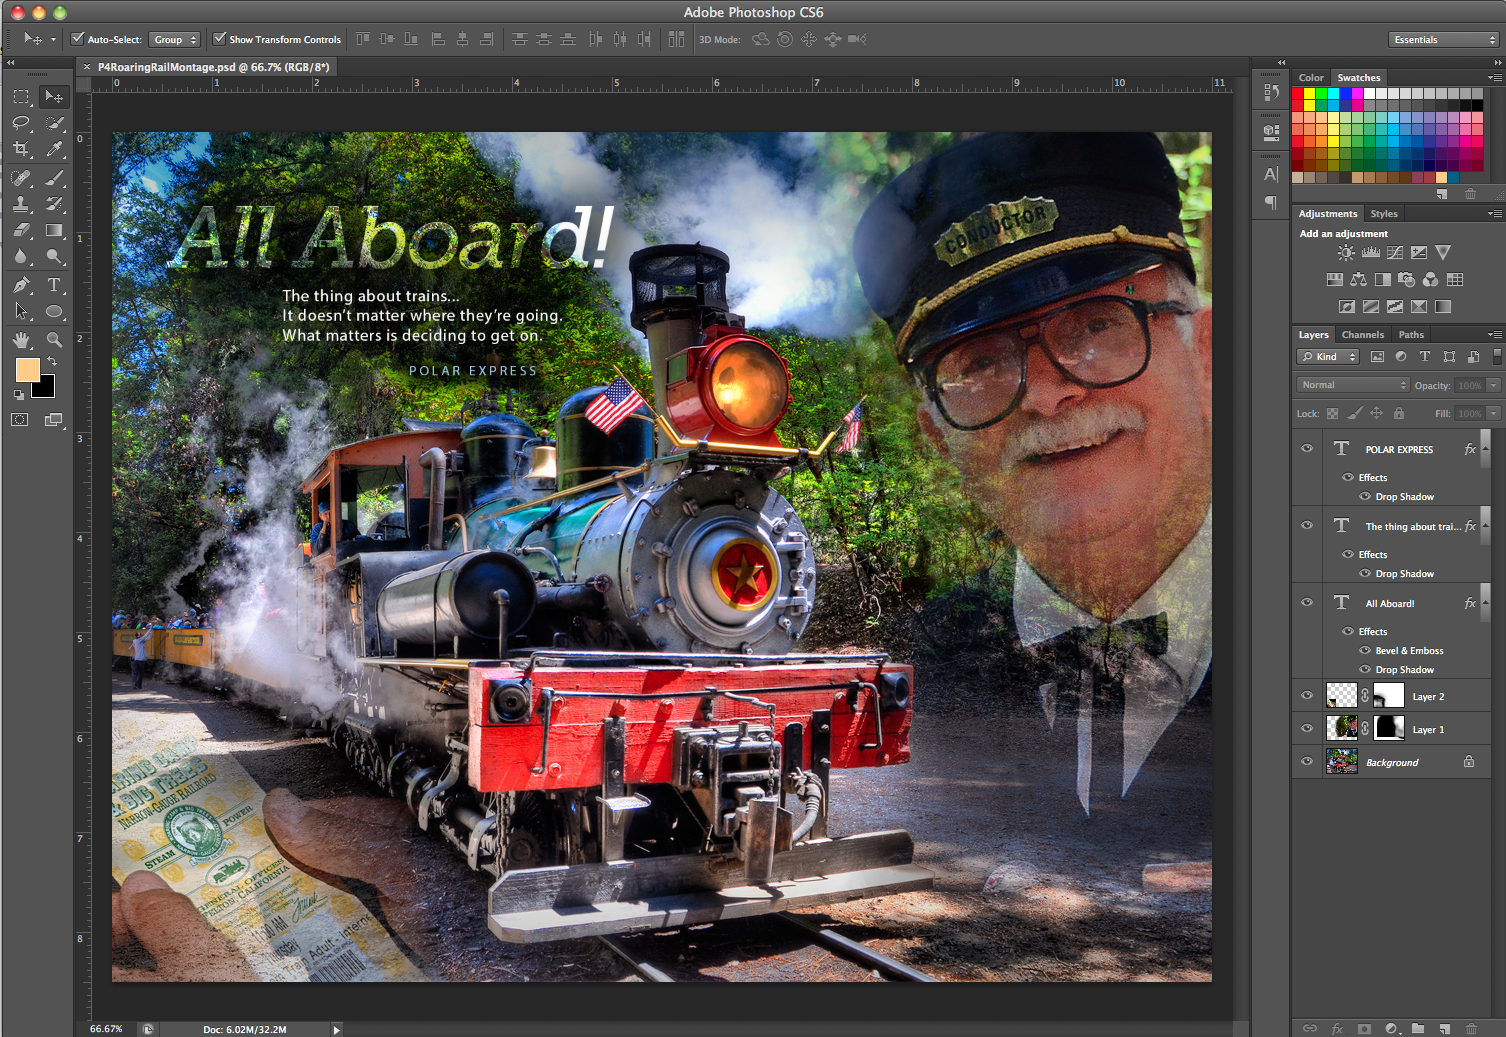
Take a screenshot of the .psd file while open in Photoshop, so I can see your layers palette and know that you used a mask to complete this activity
- How to screenshot on a PC: Press PRT SCR to copy to Clipboard, then Control V to paste. Or press the Windows button and PRT SCR to copy image to Pictures folder.
- How to screenshot on a Mac: Shift-Cmd-4 to copy image to desktop, or Shift-Opt-4 to copy to Clipboard, then Cmd V to paste.
4. RENAME
Rename the screenshot file “5CYourName.” Example: 5CJakeSpencer
5. SUBMISSION
Check the screenshot below to ensure your file looks the same. Notice the rulers show 8.5×11 inches and the image fills the screen so I can see your masking skills and the layers palette. Go to 5C Submission and upload your file. Once you have attached the file, click on it to make sure the file opens correctly before you submit it. Hit “Submit to Dropbox”.