Text Wrapping Example
(click to enlarge)
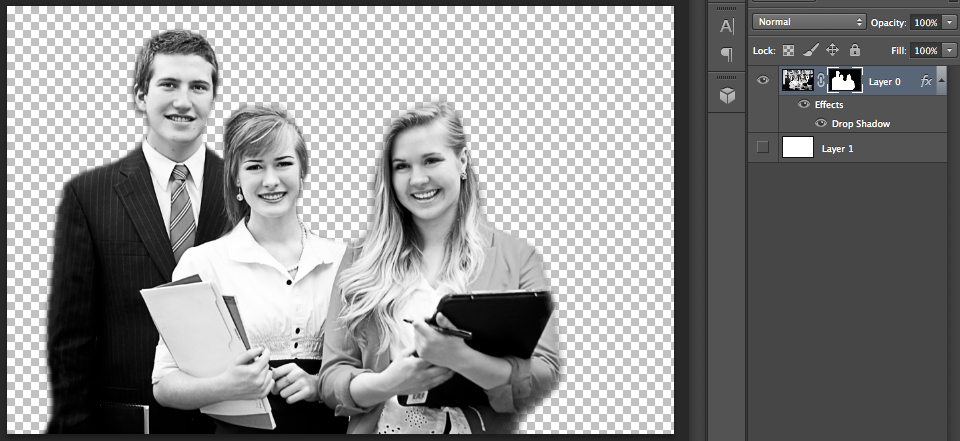
Prepare Image in PhotoShop
- In Photoshop, open the “textwrap.jpg” image from the “links” folder in the folder you downloaded for this activity.
- In the Layers palette, double-click the background layer and click OK to unlock it.
- Press “W” on the keyboard to select the Quick Select Tool (or “L” for the Lasso tool, depending on which selection tool you would like to use) to make a clean selection of the three students on the left. TIP: Follow this video tutorial. Online students, ask the tutor for assistance. On-Campus students, ask the lab assistant for assistance.
- Go to “Select” – “Save Selection,” then name the selection so that late, you can “Load Selection” if you need to make changes to the selection.
- Go to “Select” – “Refine Edge.” Open the “View Mode” dropdown and change it to “on white.” Move the Radius, Smooth, and Contrast sliders to smooth the selection’s edge. Then add a small amout of Feathering (and reduce Shift Edge, if needed) to give it a professional finish. At the bottom of this window, change “Output To:” to “New Layer with Layer Mask.” Click OK.
- Go to “File” – “Save as.” Under “Format,” choose, “Photoshop.” This will add a .psd file extension. Save “textwrap.psd” to the project folder
(click to enlarge)
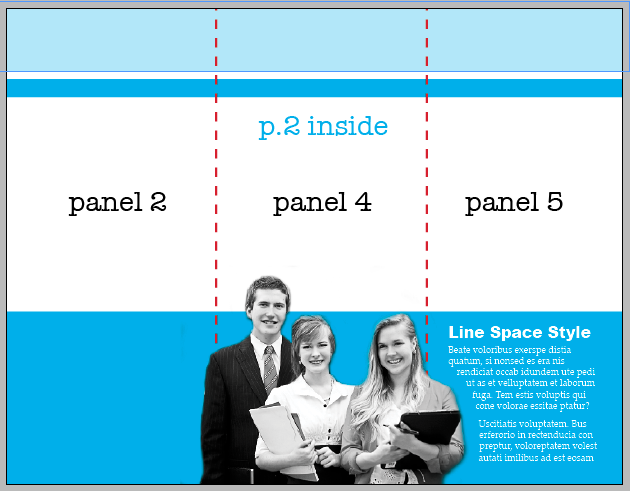
Place .psd into InDesign
- Open the same InDesign file that you used to set-up paragraph styles.
- Go to “File” – “Place” (CMD + D) and select the textwrap.psd.
- The image will be loaded into the cursor.
- Click and drag the image to the desired size. Use the Selection Tool (V) and Free Transform Tool (E) to match the size/placement in the activity example below. Place it on Panel 4 and ensure that it overlaps the text in Panel 5. TIP: The image will look pixely until you change your view: Go to View – Display Performance – “High Quality Display.”
(click to enlarge)
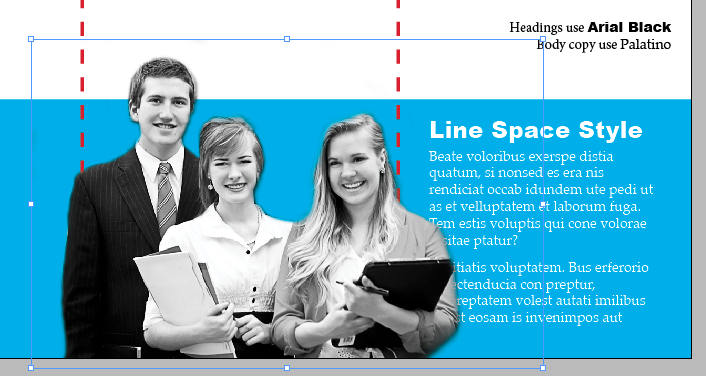
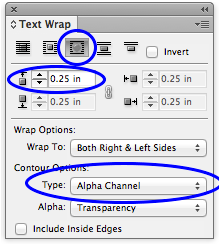
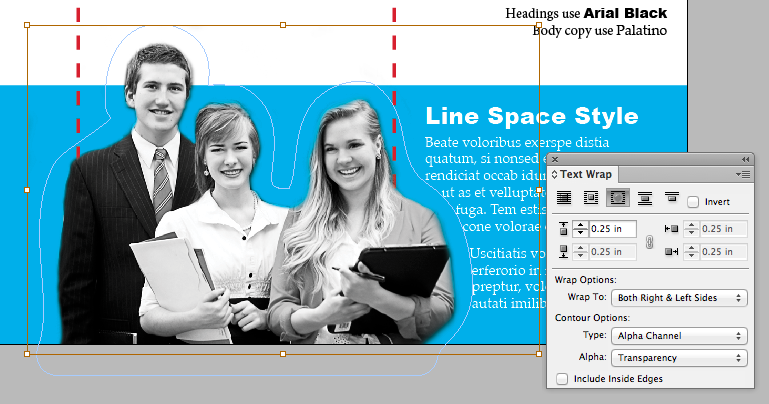
Wrap Text
- Select the placed image in InDesign (not the text box). You will see blue box handles around it.
- Go to “Window” – “Text Wrap.”
- Select the “Wrap around object shape” button (third icon from the left).
- Under “Contour Options” select “Type:” “Alpha Channel.”
- Increase the “Top Offset” to 0.25 in. This gives a gutter (spacing) between the image and the wrapped text. IMPORTANT: The text must wrap tightly around the cutout shape and not around the image box.
(click to enlarge)