Set Preferences to Inches: Open InDesign. If your rulers are not set to inches, choose InDesign > Preferences > Units & Increments, then change the Horizontal and Vertical to “Inches.”
Open New Document: Choose File > New > Document and enter the following.. 2 pages; Uncheck “Facing Pages”; Page Size: Width 18 inches – Height 12 inches; Landscape Orientation; 0.5 in. Margins. NOTE:12×18 is called Tabloid Plus size. When you fold this paper size and trim .5 inch from the outside edges, you will have a duplex 8.5×11 newsletter!
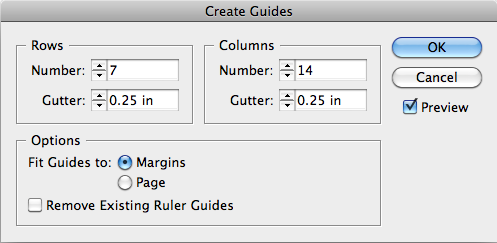
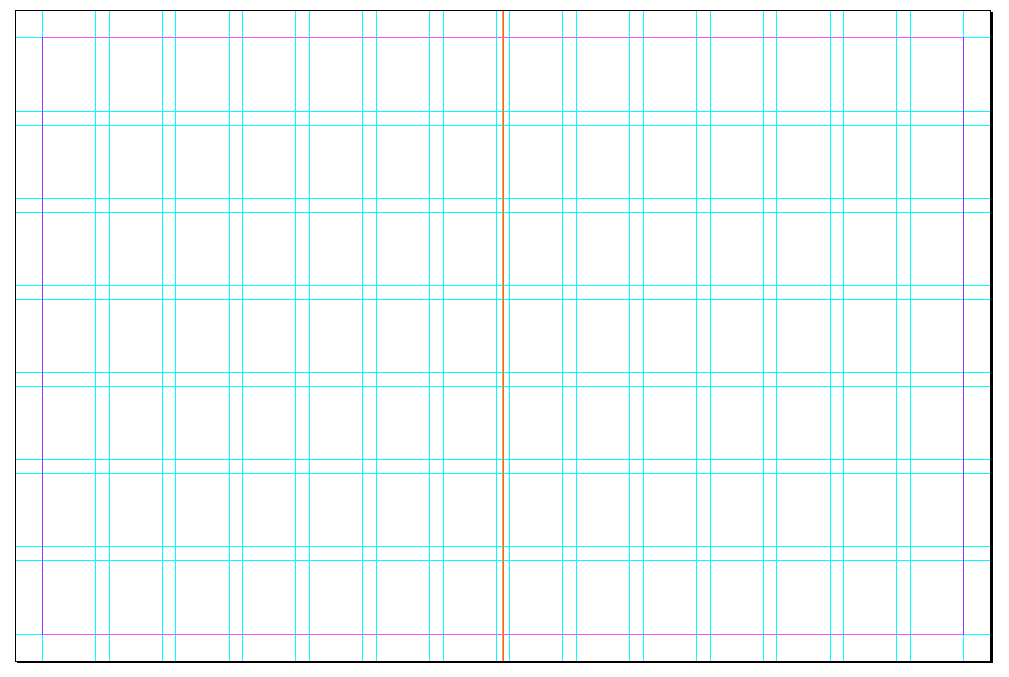
Create Guides to add a 7×7 grid on each page: Choose Layout > Create Guides and add the following: 7 Rows; 14 Columns (since this is a two-page spread) .25 Gutters; Check “Fit Guides to Margins.” Then click on page 2 and repeat to add the guides on that page. If you want to lock or unlock the guides, right-click the page and choose Grids and Guides > Lock Guides.
Add Custom Orange Guides: Separate your two pages: Click and drag inside the Left Ruler to add a ruler guide to the center at 9 inches. Right click this guide and choose “Ruler Guides” then choose Orange so this center line will contrast with the other guides. Add a orange center guide on both pages.
Add Logo:Right click here to download the logo. Save the logo to “newsletter” folder inside the main folder. Also save your InDesign document as: 10CJakeSpencer-Newsletter.indd. Then choose File > Place, find the logo in your folder and place it in the top right side of page 1, which is the newsletter front cover. To resize the logo, choose the Free Transform tool (E) and hold Shift while you drag the corner of the logo. Use the Selection tool (V) to reposition as needed.
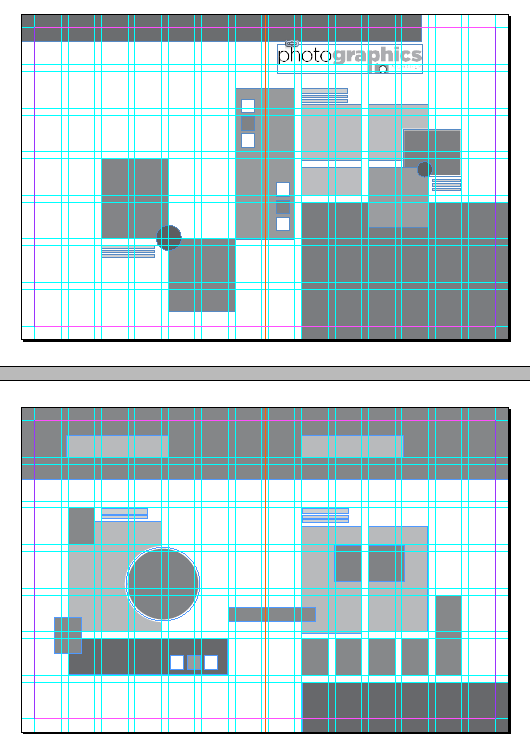
Create the Shape Map: Use the grid as a guide to create a shape map for this layout. Use the Rectangle Tool (M) (and Ellipse Tool (L) to create the gray shapes on page one, as shown in the diagram. Use lighter gray for the text boxes and darker gray to represent graphics. Click the diagram below to enlarge, so you can see where the shapes are placed in the grid lines. Notice that most shapes lie within the grid lines, but some shapes break out from the grid to add some creativity. Match the layout for page 1, but for page 2, you only need the ruler guides. Page 2 is meant to show you how the back of a brochure would look.